a baking catch-up
October 30, 2012 § 7 Comments
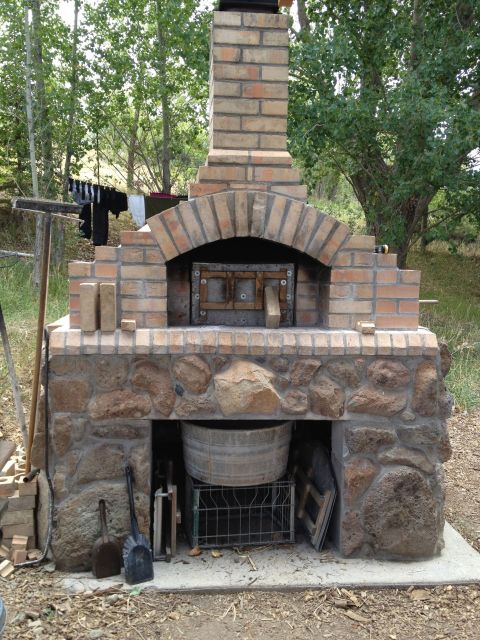
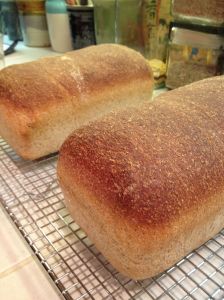
I missed both of October’s bake days for the Tuesdays with Dorie group baking its way through Greenspan’s Baking with Julia. It’s not that I haven’t been baking, really I have! In fact, dozens of loaves in my Paonia baker, farmer and friend’s wood-fired oven. I wish I had one! That oven absolutely bakes the best bread I’ve ever had, pizza too! Hana agrees!
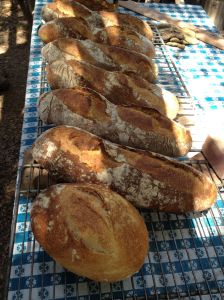
Baguettes are proofed on couche (the floured cloth). My favorite bake this day was the oversized sour dough white and whole wheat loaves.
We had pizza for lunch with chickpea socca (in the cast iron pan) for the gluten-free bakers. Even Hana got a personal-sized oatmeal loaf!
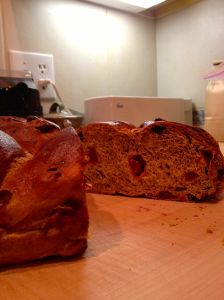
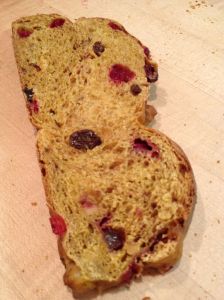
And although I didn’t get them done on the TWD schedule, here’s my not quick Cranberry Walnut Pumpkin Loaves and Bagels. They were both fun to make and turned out pretty well. I get the feeling the pumpkin bread will make another appearance on Thanksgiving when my kids join us. And bagels are one of my favorite breads. I made some tweaks to the recipe because I think bagels need to be dense and chewy and never have enough sesame seeds. These were easy enough to make with the overnight rise, shaping chilled dough and immediately boiling and baking, so I hope to bake and not buy bagels from now on.
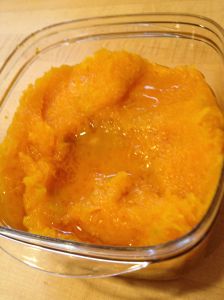
For the pumpkin bread start by roasting a pie pumpkin. I used a variety called Winter Luxury and got enough punkin’ purée for bread and a pie down the road.
I melted the butter to combine it with the pumpkin and sugar, rather than creaming it. Here’s the finished dough.
Instead of making three little pan loaves, I rolled out three strands of dough to braid. Here’s the braid before and after proofing.
The egg wash gives the bread a very dark crust. This particular pumpkin wasn’t very sweet, so next time I’ll be sure to adjust the sugar. Pretty slices though!
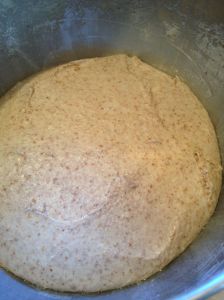
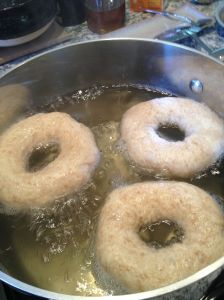
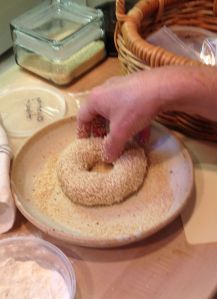
Onto the bagels. I substituted a 1/2 cup of rye and 1 cup of whole wheat for some of the all purpose flour, and added a little vital wheat gluten for some extra chew. I left out the shortening in the recipe as well. After an overnight rise in the refrigerator bagels were shaped from the still chilly dough and almost immediately went for a swim in the hot tub.
A brief drain on a rack, then the still wet and now poofy bagel gets lots of seeds on BOTH sides (I like sesame seeds).
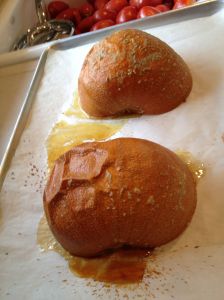
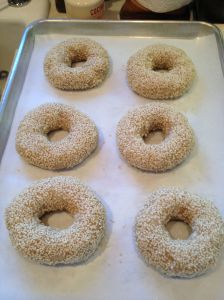
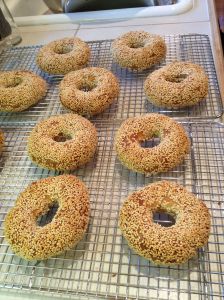
Onto the sheet pan, into a hot oven for about a half hour. I barely let them cool.
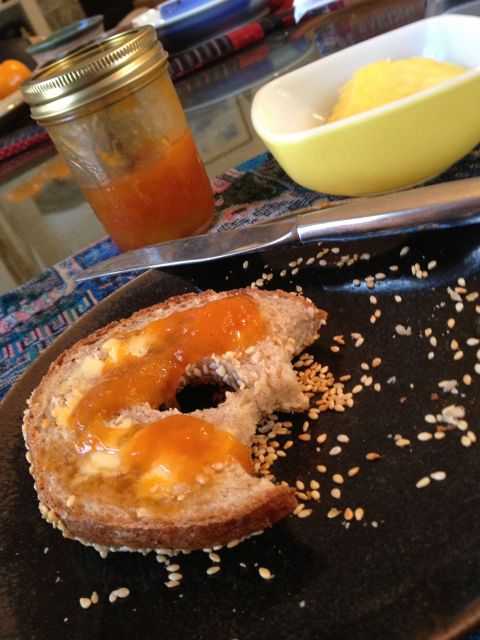
Yum! Warm seedy buttery jammy homemade bagel. Wow!
summer-to-winter and learning about tagines
October 26, 2012 § 12 Comments
Can you believe that these pictures were taken just one day apart? Los Angeles is still enjoying mild summer-like days. I took picture #1 Wednesday morning in my folks’ back yard; can you see the fat praying mantis hiding in the shade of the pulmeria blooms? Flew back home to Colorado and awoke on Thursday to picture #2, this snowy scene in our back yard; first real snow of the season! Unfortunately the early heavy wet snow can be hard on trees that haven’t shed their autumn leaves yet and can result in broken branches.

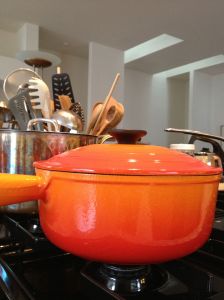
This was the back drop to making a chicken tagine for FFwD. Tagine refers to both the North African cooking vessel and the dish itself, usually an aromatic braise of vegetables and meat cooked stovetop. A contemporary example above is from Williams Sonoma. Even if you don’t own a tagine (which I don’t) you can make a perfectly good tagine with a pot that has a tight-fitting lid and that distributes heat evenly. My heavy Le Creuset pot made of enameled cast iron made a fine substitute. Although pricey, it is multi-purpose and I’m lucky enough to have an outlet store nearby in Lakewood, one of Denver’s suburbs.
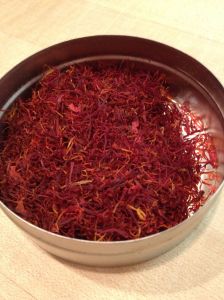
Moroccan tagines traditionally use a spice mixture called ras el hanout which means “top of the shop” in Arabic, indicating the best quality spices in the blend. Dorie used a simpler approach of just a few spices along with a pinch of saffron in her Around my French Table recipe. Unfortunately I learned that there can be too much of a good thing when it comes to saffron. I used a big pinch of some lovely Spanish saffron for a half recipe which completely overwhelmed all the other spices with a somewhat medicinal flavor. Sigh…
Saffron is the most expensive spice in the world and comes from a fall-blooming purple crocus which I have tried to grow but with limited success. So what I use in cooking is a 1/2 ounce container of Spanish saffron. I just checked and saffron is around $100 for just 1/4 ounce now. Ouch! Since I didn’t have sweet potatoes handy for this recipe I substituted delicata winter squash from my winter CSA (community-supported agriculture) share.
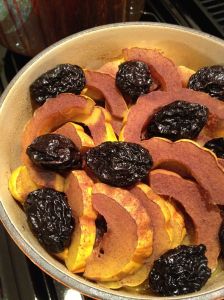
Here’s the not-a-tagine pot I used for cooking. The chicken and onions are under the squash slices and prunes; the brown color is from cinnamon-sugar I sprinkled on the squash (it wasn’t very sweet yet).
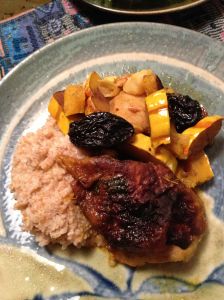
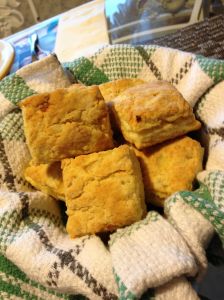
We had cracked farro “polenta” along with the chicken tagine. My only make-up recipe this week were the St.-Germain-des-Prés onion biscuits (March 2012) which were delightfully flakey, rich and savory.
stone soup ~ L.A. style
October 18, 2012 § 12 Comments
I flew into Los Angeles a few days ago to spend some time with my parents. When I arrived it felt like I had taken a short trip back in time from our coolish fall back to over-90 summer again, not exactly what I had in mind. But yesterday I awoke to a cool overcast morning and the clouds gave us enough shelter to make soup sound like a good idea for supper.
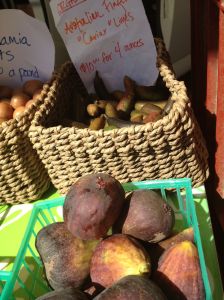
On Wednesday my sis and I had gone to the Santa Monica Farmers’ Market, one of my must visit stops on almost every trip to L.A. The Wednesday market is even bigger than Saturday’s, since that’s the day many Los Angeles chefs shop for fresh local ingredients. Australian finger caviar limes or fresh figs, anyone? We didn’t buy anything too crazy on this trip since my parents like pretty simple food.
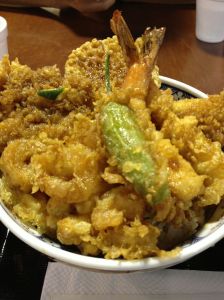
Nearby there’s some good Japanese shopping and dining in West L.A. We found lunch at a Japanese food court inside of a Japanese market – a big bowl of shrimp and anago eel tempura over rice. It came garnished with a shishito pepper and a poached egg, both also tempura deep fried. It was messy and delicious! Living in Colorado, I do miss the breadth and depth of the L.A. food scene. Onto our own food scene in my parents’ kitchen last night…

Do you remember the story of Stone Soup? This is the edition I remember reading many times in my childhood. To me it’s the story of creating a delicious meal and community seemingly from nothing, and discovering the bounty of food and camaraderie that people once strangers can share.
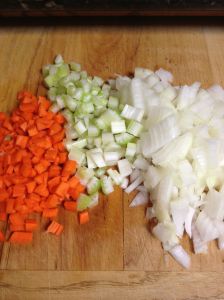
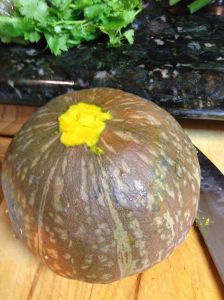
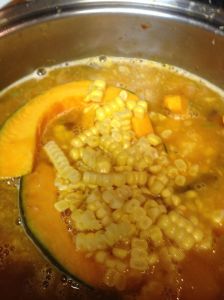
We started with some gems from the farmers’ market, the last of the season’s corn and a small kabocha winter squash (Japanese pumpkin), two of my mom’s favorite vegetables and a perfect transition to fall. Most of the other vegetables were household pantry and refrigerator staples that provided the classic French base for stocks, soups and stews, mirepoix. This is just a fancy word for two parts onion and one part each of celery and carrot which I cut into a small dice to cook evenly and look pretty in the finished soup.
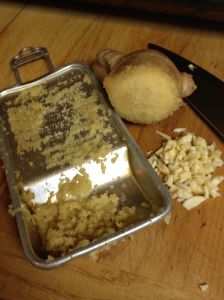
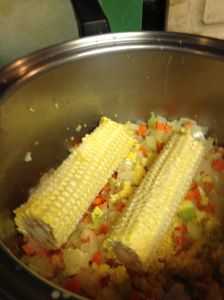
To get the most flavor from the ingredients, I grated the ginger, minced the garlic and added the corn cobs after cutting off the kernels which I set aside. There were a couple of small tired wrinkled tomatoes from the garden; I peeled, cored, crushed and then added them to the soup base too. A sprinkling of salt and I had a true stone soup approach to using everything available.
After adding water and a touch more salt and removing the corn cobs, I had a flavorful and aromatic broth that did not need the addition of chicken stock. In fact I think chicken stock would have masked the light flavor of the vegetables and background notes of the ginger. For the same reason, I omitted adding the herb sprigs of thyme and rosemary Dorie called for in her Around My French Table recipe. While the vegetable base had been cooking, I prepared the kabocha squash for it’s starring role by first removing the stem (either cut just underneath, or struck with the back of a heavy knife).
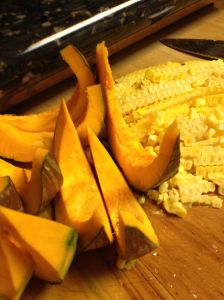
The hard part is splitting hard winter squashes open, so be patient, use a large heavy and sharp knife and watch those fingers! You can easily scoop out the seeds and pulp with a big spoon. I cut the squash into big wedges as they’ll break down into smaller pieces as they cook and get tender and soft.
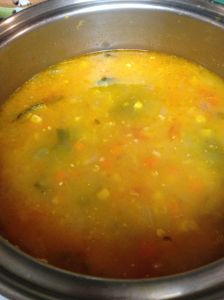
Everyone into the jacuzzi! Another 10-15 minutes of gentle simmering and we have a be-ooo-ti-ful soup! Taste for flavor and seasoning.
I added a spoonful of white miso for some salt, sweet and umami. I had baked a loaf of sourdough for my dad before leaving Colorado, so that and butter were the only additions our soup dinner needed.
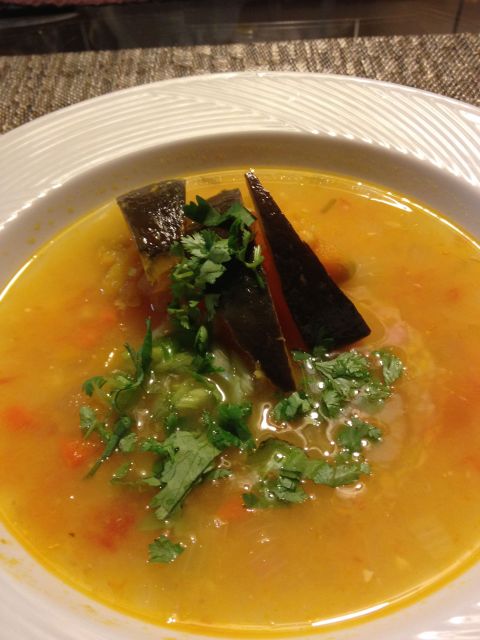
My version of spur-of-the-moment vegetable soup, aka stone soup a la SoCal Japan garnished with some cilantro and scallion.
And here are my make-up FFwD dishes from the last couple of weeks…
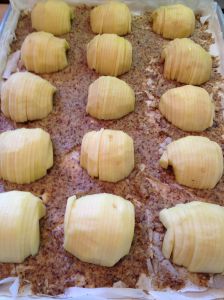
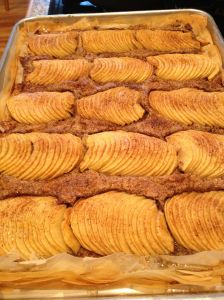
Last week’s crispy crackly apple almond tart was a big hit at our annual Oktoberfest pot luck, a perfect finish to the hearty celebration dinner of sauerbraten and red cabbage that our friend Paul has perfected over the years.
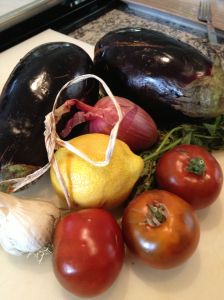
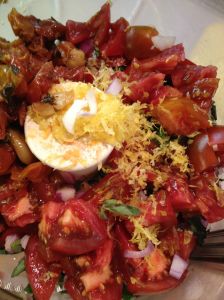
I contributed eggplant caviar (August 2011) prepared with end of the season eggplant and tomatoes to another potluck, this one at Cure Farm’s fall CSA pig roast party. The tiny glistening bits of vegetables coated with the olive oil and lemon juice did remind me of caviar, but I forgot to take a picture of the final dish, whoops!
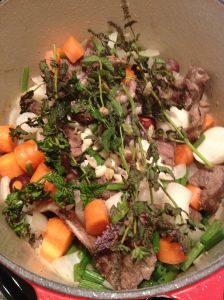
Braised cardamom curry lamb (November 2011) made a warming meal for one of the below freezing nights we had at the beginning of October, a warning of winter’s approach.
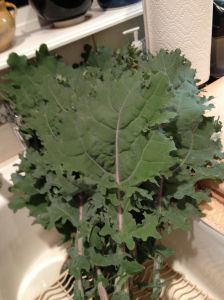
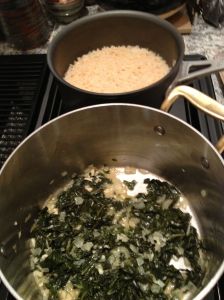
Creamy cheesy garlicky rice with greens (September 2011) was an easy fun spin on classic risotto and let me use just picked kale from the garden and whatever rice and cheese was handy. We had a couple of weeks of good eats, just too busy to write about it!
party food
October 5, 2012 § 3 Comments
I just spent ten days in Colorado’s North Fork Valley on farms, vineyards and orchards. When I wasn’t out in the fields, I was in the kitchen cooking for a couple of farm dinners or baking bread at an outdoor wood-fired oven. It was a wonderful way to end the summer, feeling pretty healthy again, enjoying the outdoors and sharing good food and wine with my western slope friends. Cause to celebrate!
This iPhone photo doesn’t begin to show how beautiful parts of the drive back to Boulder was. Fall colors this year are earlier and more vibrant oddly due to this year’s drought.
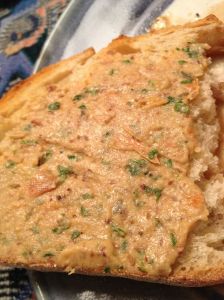
This week’s FFwD recipe is hummus, the Middle Eastern rich garlicky lemony chickpea purée I tend to associate with a Greek luncheon plate, vegan sandwich spread or better yet, a party dip with vegetable crudité or pita crisps. Dorie Greenspan’s recipe provided the structure for my version using what was currently in the pantry and refrigerator, which did not include chickpeas or tahini. It was a delicious spread that we enjoyed as part of last night’s party ah, Mediterranean meal.
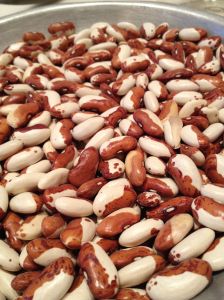
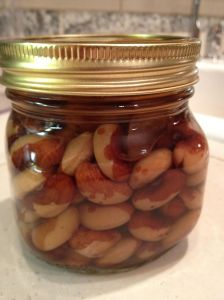
I had some beautiful heirloom beans called Snowcap. I pressure cooked them a few nights ago for some chili, but saved some for the hummus recipe. Give these beans plenty of time to cook, even under pressure; they get BIG.
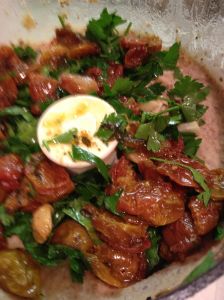
Last night I reheated the beans as they still needed more cooking time. I toasted whole cumin seeds until fragrant and then ground them to add to the hummus. To the base mixture I added a handful of parsley from the garden, and some slow-roasted cherry tomatoes I had saved in olive oil from the refrigerator. Since I don’t keep tahini on hand, I used the last of a jar of homemade hazelnut butter.
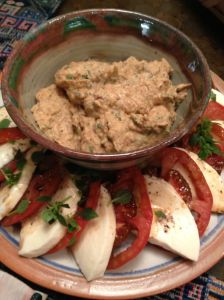
Hummus takes center stage on a plate of fresh mozzarella with garden tomatoes and basil in a salad caprese. I had forgotten how tasty it can be singing of garlic, herbs and lemon, since many times store and café versions tend to be bland and dry.
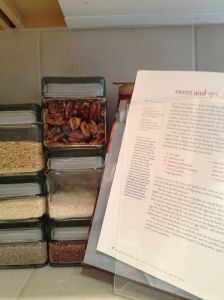
There was a recipe for sweet and spicy cocktail nuts (December 2010) on the page opposite the hummus recipe in Around my French Table. They’re not too hot, so party animal Hana gets to enjoy a couple too.
conquering the cardoon
September 28, 2012 § 6 Comments
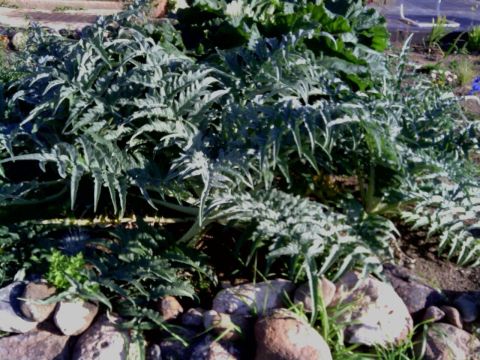
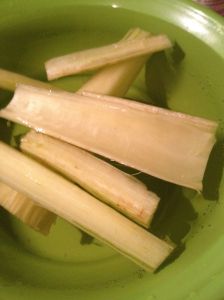
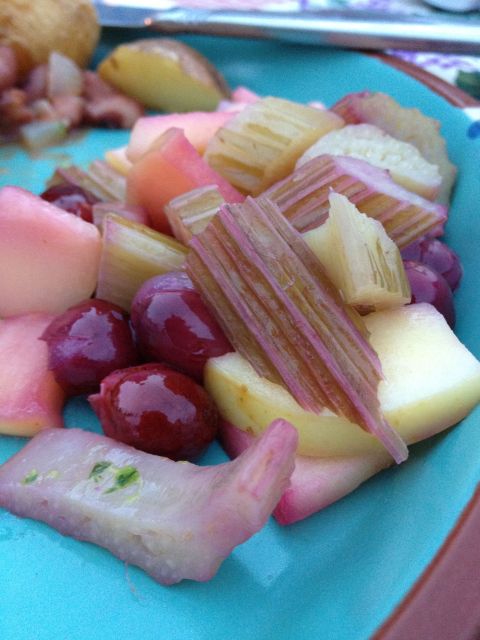
Believe it or not, this is Friday’s FFwD posting for a vegetable side dish of Endive, Apples and Grapes with locally grown cardoon (still growing above) standing in for not locally grown endive. For those of you unfamiliar with cardoon (and until a few days ago I was a member of that group) they are related to artichoke, both in flavor and appearance. The main difference is that you eat the stem of the cardoon instead of the thistle flower bud of the artichoke. They are handled similarly in preparation and cooking, although there’s considerably more effort in cardoon preparation but justifiably more reward in the yield. Here’s a slideshow preview from Saveur on the process.
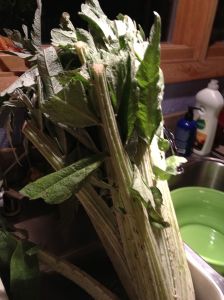
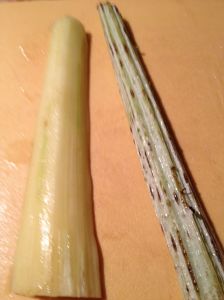
Start with one cardoon plant straight from the field. Remove the stalks as you would celery, but watch out for the prickles or wear gloves. Gloves will also prevent your fingers from being stained, but I found them too clumsy to wear, so I still have very brown fingertips three days later. You need to work with the stalks one at a time all the way through the following preparation to prevent them from turning brown before cooking. Of course this makes a lengthy preparation take even longer, but I remind you here, the rewards are great (if you are an artichoke lover)!
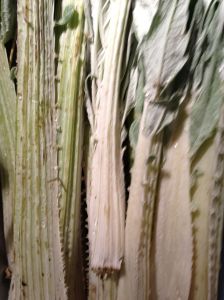
Use a knife to remove any remaining leaves and the prickles on either side of the stalk. Here is the cardoon stem “de-fanged”.
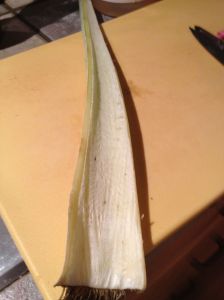
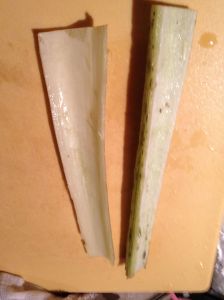
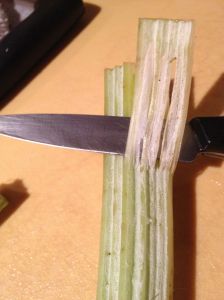
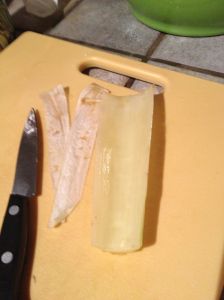
Use a paring knife or peeler (or both) to remove the strings and skin from the outside of the stem (the peeler is safer, but the strings tend to clog it up). Flip the cardoon over and carefully pull the thin white film off the inside of the stem. Rinse the stem under water often to keep it from browning (oxidizing) while you are preparing it.
Here’s what the outer skin and strings look like (I pulled most of the strings out with the paring knife and then cleaned it up with the peeler), and here’s what the white film from the inside of the stalk looks like.
The cleaned stalks go immediately into some acidulated water (water with vinegar or lemon juice added). Once you have a potful, place them into a pot of clean water with lemon juice and salt and parboil them for several minutes, depending on the desired doneness and whether they’ll undergo further cooking.
Finishing the dish is quick and easy. Slice the cardoons crosswise no larger than 1/2″ (makes them easier to chew as they can still be fibrous) and sauté in a little butter or olive oil (or both) with a sprig or two of rosemary. While that’s cooking, slice apples (I like skin on) 1/4″ thick and add to the pan. Occasionally stir or toss for even cooking, but it’s nice to get some caramelization on the edges of the vegetable and fruit. Finally toss in some whole grapes and cook until they start to release their juice. I really reduced the cooking time for this dish to get a much fresher result; I was also running out of time because cardoon preparation took so long. But I and the guests were very pleased with the result! All of the ingredients came from my friends’ Max and Wink’s orchard, vineyard and garden, and the dish was part of a celebratory wine grape harvest dinner at their winery.
where France meets Spain
September 21, 2012 § 11 Comments
I’ve always been a little confused whether the Basque region is part of Spain or France. Turns out it’s part of both. Called the Basque country, it straddles the northern Pyrenees mountain range and borders the Atlantic ocean. Here’s a map courtesy of Wikipedia.
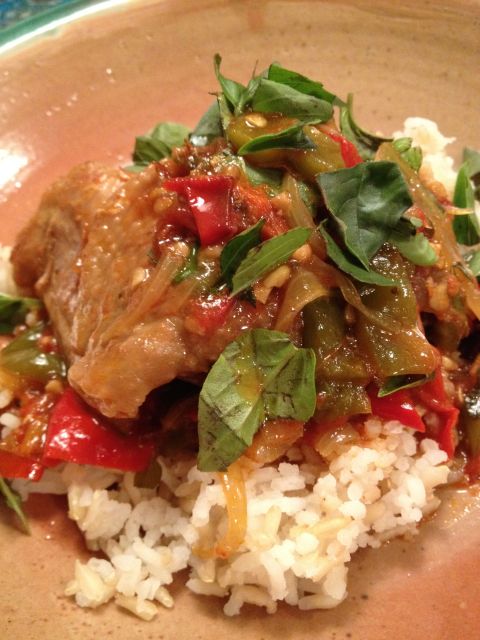
The FFwD group made chicken basquaise this week. When you see ‘aise’ appended to a country’s name, that simply means “in the style of” in French. Basquaise implies peppers and tomatoes and lots of them, so it’s a perfect late summer dish to use our locally grown vegetables which are in abundance and great variety right now.
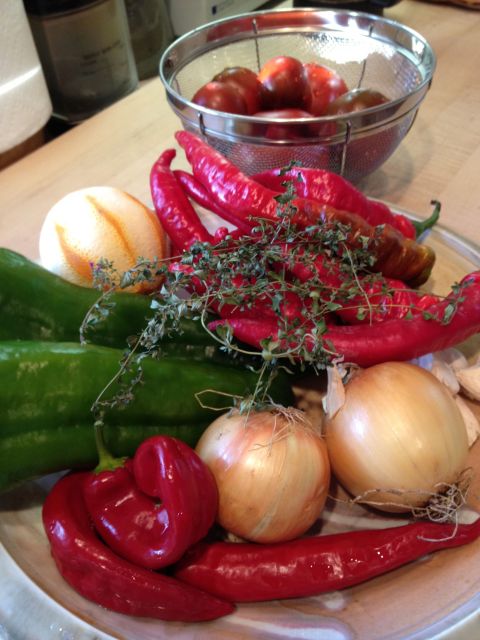
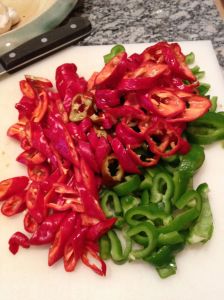
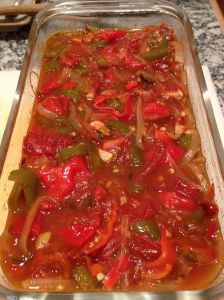
Here are the ingredients to make the pipérade which is the aromatic base for this stew – three kinds of peppers (green, I used my favorite Jimmy Nardello’s for the sweet red, and chiles for some spice), onion, garlic, thyme, oregano, bay leaf, dried Espelette pepper from the region and tomatoes. I used the juice from a zested orange since I had it.
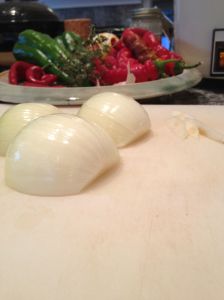
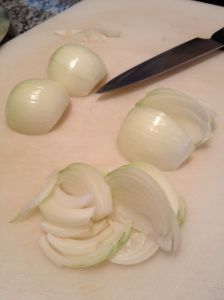
Dorie Greenspan, the author of Around my French Table, gives very precise instructions to thinly slice the onion crosswise. When onion doesn’t need to be chopped or diced in small pieces, I tend to use a cut the French call émincée. Peel the onion, cut it in half lengthwise and then remove the core by cutting out a small wedge from the bottom of each half. Then slice thinly also lengthwise following the hemisphere shape of the onion so that each slice is a thin wedge. I like this shape, and the thin pieces cook quickly and evenly. Start sweating the onions in a little olive oil while you prep the rest of the vegetables.
The different peppers are sliced, along with the chile. I tasted the chile and it was hot enough that I decided to only add one, not the three the recipe called for. The peppers go in with the onion to also sweat, then the tomatoes, herbs and spices are added and the mixture simmered for about a half hour to meld their flavors. The chicken is separately browned and then combined with some of the pipérade and braised long enough to become tender 45 minutes or longer, depending on your chicken.
To me chicken basquaise served over rice is a colorful version of the more familiar Latin or Cuban arroz con pollo.
I made a second FFwD recipe with the breast meat and carcass from the whole chicken I got from Cure Farm for the basquaise recipe. Spicy Vietnamese Chicken Noodle Soup (Oct. 2010) was a fantastic flavorful and exotic version of a chicken soup.
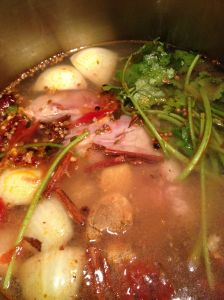
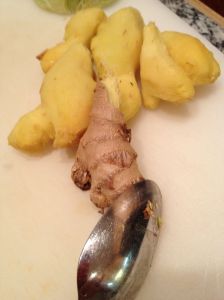
I modified the recipe to use the aromatics to make a quick Asian influenced chicken broth with just 20 minutes of pressure cooking. Do you end up with what my friend Marcia calls “ginger turds” in your vegetable drawer (the leftover pieces you don’t use and they dry out or spoil)? I finally learned to peel all the ginger and then freeze whatever was left in small pieces. These thaw out quickly and are firm enough to slice, chop or mince for future dishes, instead of going to waste.
I made the curry variation of this soup. A key technique to enhancing the flavor of many spices is to cook them first (dry toast or in oil) before adding the rest of the ingredients. It’s absolutely critical to not burn them of course, you are just heating them enough to bring out their flavors. Instead of using bean sprouts for garnish, I used some fresh raw corn and tiny currant tomatoes, along with mint, cilantro and lime wedges. Oh, and since I had rice leftover from basquaise night, I used it instead of rice noodles. Now that it’s starting to cool down it will be fun and tasty to make this soup again and vary the seasonal garnishes.
back to bread
September 18, 2012 § 16 Comments
We had so many hot dry days (a record number) this summer, but the autumnal equinox is right around the corner. Cooler night time temperatures are reminding the tomatoes they need to hurry up and ripen, and the day time temps are bouncing from the 80’s to 60’s. I took advantage of a 60 degree day to bake the Whole Wheat loaves from Baking with Julia with the TWD group today.
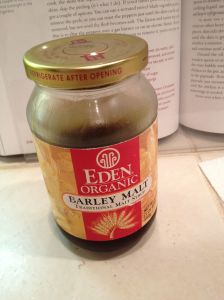
Farmer John (yes, that is really his name) has been experimenting with growing grains in Boulder County the last few years, with rye joining his hard red winter wheat this year. I like the flavor of rye so I added a little to this recipe. And while Craig Kominiak’s recipe called for malt extract (available at beer brewing supply stores) I used the barley malt syrup I had on hand. It contributed a rounded toasted sweetness to the bread, along with the small amount of honey called for. I skipped adding the even smaller amount of oil in the recipe.
For baking I almost always use a scale to measure ingredients by weight, and I find it especially important when baking bread to help get predictable and consistent results. I use 5 oz. per cup of flour (any type, it’s close enough), 7 oz. per cup of granulated or brown sugar, 8 oz. works for a cup of most liquids, water, milk, oils, butter, but not all (honey is much denser than water for instance). I found this recipe on the dry side for me and at our altitude of 5000′. For the total two pounds of flour, I up’d the water to 2 3/4 cups. In baker’s math, this means 22 oz. water/32 oz. flour = 68%, which is the target hydration that tends to give results I like. I also had to lengthen the baking time by about 10 minutes for this wetter dough.
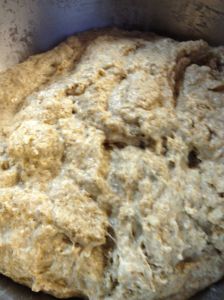
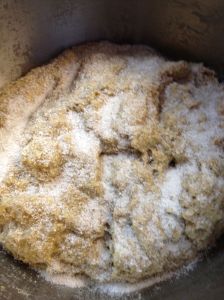
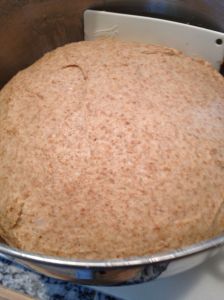
I lightly mixed all the ingredients together except for the salt, covered the dough and let it rest for a half hour. I like to do this for a couple of reasons. Salt strengthens gluten and inhibits yeast activity, so I lighten the load on my mixer a bit and let the yeast get going. The rest period allows the flour grains to thoroughly hydrate and gluten actually starts to develop on its own. You can even see a few strands in the second picture after the dough has rested and even risen a bit.
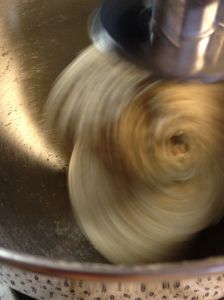
I sprinkle the salt over the rested dough and then mix with the dough hook on a low speed (2 on the KitchenAid). It only takes 4-5 minutes instead of the 10 minutes at medium to achieve a well-kneaded dough with adequate gluten development.
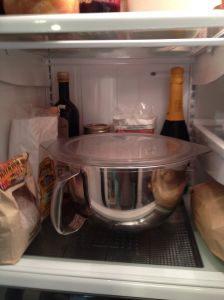
I had an appointment in town and some errands to run so I covered the dough and popped it into the refrigerator for a slow leisurely rise (this is called retarding since you’re slowing the dough’s activity).
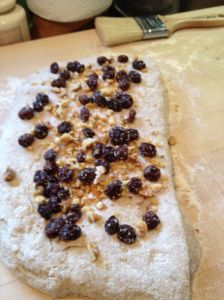
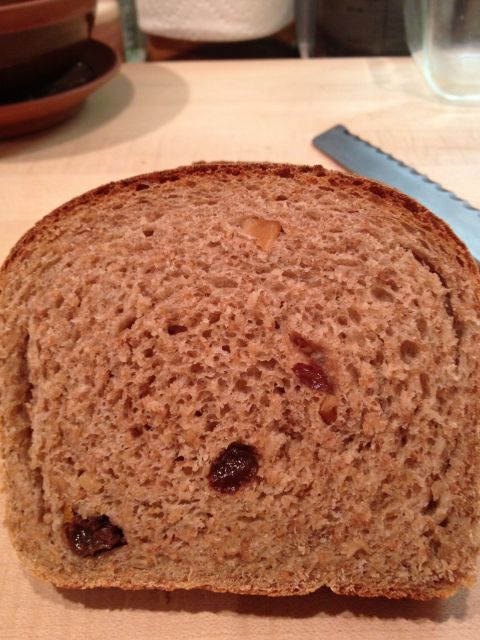
The dough was fully risen without being over-fermented by the time I got back home 3-4 hours later. I decided to roll in some plumped raisins, chopped toasted walnuts and some chopped candied orange peel leftover from poaching apples for FFwD last week.
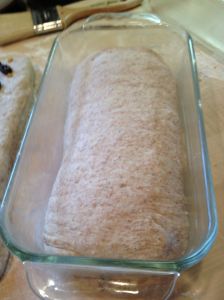
The recipe makes two loaves, so I made one plain and the other with the raisin nut add-ins. Don’t forget to butter the baking dish!
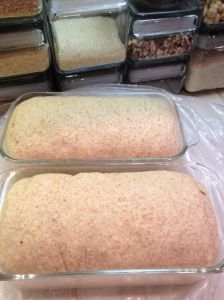
Since the dough is chilled from the refrigerator it takes over an hour to rise enough to fill the pans. And being half whole grain and half white flour, the loaves are pretty heavy and don’t rise much more in the oven.
This bread had a very moist crumb that benefits from toasting. Some butter and cinnamon sugar doesn’t hurt either!
apples, apples and more apples
September 14, 2012 § 14 Comments
Dorie’s Spice-Poached Apples or Pears from her book Around my French Table is a simple dessert, perfect anytime you need a little sweet after dinner (which is every night for me). You can use almost any seasonal fruit in this recipe and it’s something you can make in a half hour or so, unless you grew your own apples too, in which case it will take you most of a year.
Here’s our Honey Crisp apple tree last month. It’s been an extraordinary year for fruit on the Front Range of Colorado. Unfortunately, most of our apples feed the critters, from insects to the birds and squirrels that snack just before the fruit ripens. So I have to pick them a little greener than I like if we want to get our share. See the big bite out of the one in the middle of the photo?
Here’s what we got from the little Honey Crisp tree and the much bigger Cox Orange Pippin tree, really not a huge difference and so much easier to pick from the smaller tree (note to self for future fruit tree management). Onto the recipe…
The apples I used were from our third tree, the youngest so it contributed a smaller harvest this year. I had lost its tag but from my web investigations I think it’s a Greening apple of some type, a very old American apple variety and supposedly the best for apple pie of course! Here are the apples bathing in their spice-infused poaching liquid (I added a cup of white wine for some acidity to balance the sweetness of the honey and sugar). I like to use a parchment cartouche to keep the heat and moisture against the apples. This allows the steam to escape to avoid overcooking under a lid and you can keep an eye on the cooking process. Different types of apples at different ripenesses are completely unpredictable in how long it takes them to get to tender-but-not-falling-apart doneness.
Poached fruit is the perfect easy seasonal dessert simply served with some of its syrup and a little vanilla ice cream.
Here are the French Fridays with Dorie catchup recipes we enjoyed this week as well…
I reconstructed Dorie’s Deconstructed BLT with Eggs (September 2011) subbing kale braised with bacon and poaching the eggs instead of hard boiling, achieving a more tartine look. Savory Cheese and Chive Bread (March 2011) was everything its name promised and quick too.
The highlight of the week was Salmon and Tomatoes en Papillote (July 2011) but I couldn’t resist buying some beautiful pink-fleshed trout instead. We ate Pancetta Green Beans (February 2011) alongside. All the vegetables and herbs for these dishes came from local farms or the garden, and the pancetta came from Cure Farm as well.
Finally apples and ice cream made another appearance in the guise of Marie-Helene’s Apple Cake (October 2010) for dessert one night, and an encore as breakfast. This was a very bon appetit week!
an upside-down cake
September 4, 2012 § 19 Comments
As you can see, I had a hard time wrapping my head around this cake. It looks nothing like the caramelized and streusel-filled Nectarine Upside-Down Chiffon cake by pastry chef Mary Bergin in Baking with Julia. And while my version has a pretty face, I do wish I had remembered to include the streusel; I made it but forgot to add it when filling the cake pan. My cake could have used that extra punch.
 Replicating Mary’s nectarine cake was just not to be. First of all, this has been a great year for fruit in Colorado, and our most important fruit crop is probably peaches (move over Georgia). I had bought a case, “inherited” a case and then was given cases of peaches. I needed to preserve the onslaught of peaches without having an extra freezer or the time it takes to make several batches of jam or butter; these babies were RIPE and needed to be processed right away. So I now have several pint jars of canned peaches in light syrup in the basement. I used three of them to make this cake! I opted for granulated instead of the brown sugar under the peaches thinking I’d get some caramelization during baking.
Chiffon cakes, like genoise (remember June’s French Strawberry cake) rely heavily on the nature of eggs, in this case separated yolks and whites. Since I used these lovely farm-sourced eggs which vary in size as well as color, I selected the ones closest to large size. You can also measure them if needed allowing 1/2 oz per yolk, and 1 oz per white. (Check out this new and amusing way to separate eggs.) At this point, the rest of the dry and wet ingredients have been combined and are just waiting for perfectly whipped eggs whites at medium stiffness. If the whites are under whipped they won’t contain enough air to lift the batter, but if they’re over whipped they contain too much air and end up popping as the heated air expands in the oven and your cake collapses. At sea level, you can whip the whites a little stiffer than mine at 5000 feet, but definitely don’t let them start looking like popcorn or weep, both signs of severe over beating and impending cake disaster. Start over, it’s worth it.
“Sacrifice” 1/4 to 1/3 of the whipped eggs whites to lighten the batter. I just quickly whisk in with the mixer attachment and avoid one more things to wash. Don’t worry if the whites are streaky in the batter at this point.
Now add the rest of the egg whites and quickly fold in with the spatula. Stop once the batter looks uniformly mixed. If you continue to fold pass this point, you start to deflate the batter and are also on the road to a tough cake.
Working quickly to avoid losing the precious breath of your cake, pour it into the prepared cake pan (don’t forget to have buttered the sides) and level by just tilting the pan around instead of using the spatula to smooth the surface (the less touching, the better now). Here’s the cake just before going into the oven, and here’s my streusel I discover in the refrigerator just after that. Oh yeah, forgot to bake and cool the streusel, so it’s not going to happen this time.
Another altitude adjustment I made was to increase the oven temperature by 25°F for the first 10-15 minutes of baking, but again I forgot to turn the oven back down to the correct temperature. So it’s a little dark on top, but you see how level it is as the top sets before it can dome too much and then collapse. The final verdict after altitude adjustments and boo-boos? Pretty peaches, but the cake’s a little too wet (almost like pudding, if you like that) just underneath them. Beautiful yellow color, but actually a little too eggy in taste for chiffon to me. A little bit of a plain-jane, should’ve remembered the streusel layer and used the brown sugar with the peaches.
too pooped to post
August 22, 2012 § 13 Comments
Well, almost. I wasn’t too pooped to pop though, and after seeing all the triumphant puffy popovers posted by the other punctual Tuesdays with Dorie members, here I am with my tardy popovers and a quick (for me) recap.
Little did I know when I bought these mini-cake pans years ago, that I had in fact purchased popover pans. Their straight sides looked perfect for turning out little chocolate cakes, which they did admirably then. They look and feel like cast iron covered with a durable non-stick, so they distribute heat evenly and with a thin coating of butter, nary a crumb of popover stickiness. I have no idea who made them or where I bought them.
One of the best things about popovers is that you almost always have all the ingredients you need – milk, eggs, butter, flour, salt – and they are very easily mixed together by hand or machine, just dump and mix! I recommend, however, that you never plug in the blender when you’ve already loaded the pitcher onto the base, but haven’t placed the lid on yet. Yeah, did that, but skipped taking a picture of the result. 😦
Like many of the TWD’ers I made this recipe more than once since it’s quick (unless you forget the blender lid) and the ingredients are readily available. It’s so intriguing and almost magical when you get these big puffy baked things from a 1/3 cup of rather thin batter and it’s pretty fun to watch them bake too. I altitude adjusted the first batch on the left by adding 1 1/2 cups each of milk and flour instead of the original 1 cup; these definitely rose taller and kept their shape better. The extra flour develops more gluten for structure, while the extra milk keeps the ingredients in balance and prevents dryness. While they looked amazing, they were a little doughy inside and a bit on the chewy side for me. So I went back to the original unadjusted recipe for Round 2. I bumped up the salt to 1 teaspoon of coarse kosher, and even added 1 tablespoon of sugar as Round 1 was also a little flat in taste while not in height. Round 2 did not have the impressive height of the altitude-adjusted batch, but I liked the more tender crumb, thinner crust and completely hollow interiors which were the perfect vessels for some homemade preserves.
And while we could have easily consumed both batches with my son visiting, I sent some of AA (altitude-adjusted) Round 1 to our next door neighbors along with apricot butter. The three of us enjoyed the rest alongside a summer frittata and cottage bacon Sunday brunch.
